A single splash of bleach can ruin a favorite shirt before you even realize what happened — but knowing how to fix bleaching stains properly means that “ruined” doesn’t have to be permanent. The outcome depends on the fabric, how quickly you act, and which method you choose. Some fixes are surprisingly simple; others take a bit more patience. Either way, there are real, proven solutions worth knowing.
Why bleach damage looks the way it does
Bleach doesn’t stain fabric the way coffee or wine does. Instead, it strips the dye from the fibers, leaving behind a pale yellow, orange, or white patch depending on the original color and fabric type. This is an oxidation reaction — the bleach breaks the chemical bonds in the dye molecules, making the color disappear rather than just cover it.
Understanding this distinction matters because it changes the approach entirely. You’re not trying to remove something from the fabric — you’re trying to restore or replace what was taken away.
First steps: act before the damage sets deeper
If bleach has just made contact with the fabric, speed is your best ally. The longer the chemical sits, the more dye it destroys — and the harder any repair becomes.
- Rinse the affected area immediately with cold water — do not rub, just flush thoroughly from the back of the fabric.
- Neutralize the bleach with a small amount of white vinegar diluted in water, then rinse again.
- Blot the area dry with a clean cloth and assess the damage before deciding on a repair method.
These steps won’t reverse the discoloration on their own, but they stop further fiber damage and give you a cleaner base to work with.
Matching the method to the fabric and color
There’s no single solution that works across all situations. The right technique depends on what the garment is made of and what color it originally was. Here’s a practical overview:
| Fabric/Color type | Recommended approach |
|---|---|
| Dark-colored cotton or synthetic | Fabric dye pen or permanent fabric marker in matching color |
| White cotton or linen | Diluted bleach applied to surrounding area to even out tone |
| Colored denim | Fabric dye bath or spot dye application |
| Delicate fabrics (silk, wool) | Professional dyeing service is safest |
| Any fabric with small stain | Creative cover-up: embroidery, patch, or bleach art technique |
Using fabric dye: the most reliable restoration method
For most colored garments, re-dyeing the affected spot — or the entire piece — produces the most consistent result. Spot dyeing works when the bleached area is small and you can closely match the original shade. Full immersion dyeing makes more sense for larger damage or when an exact color match is difficult.
Fabric dyes designed for home use are widely available and work reliably on natural fibers like cotton and linen. Synthetic fabrics require dyes specifically formulated for polyester or nylon — using the wrong type produces little to no result.
When spot dyeing, apply the dye with a small brush or cotton swab, working from the outside edge of the bleached area inward. This blending technique reduces visible borders between the repaired zone and the surrounding fabric. Let it dry completely before rinsing and assessing whether a second application is needed.
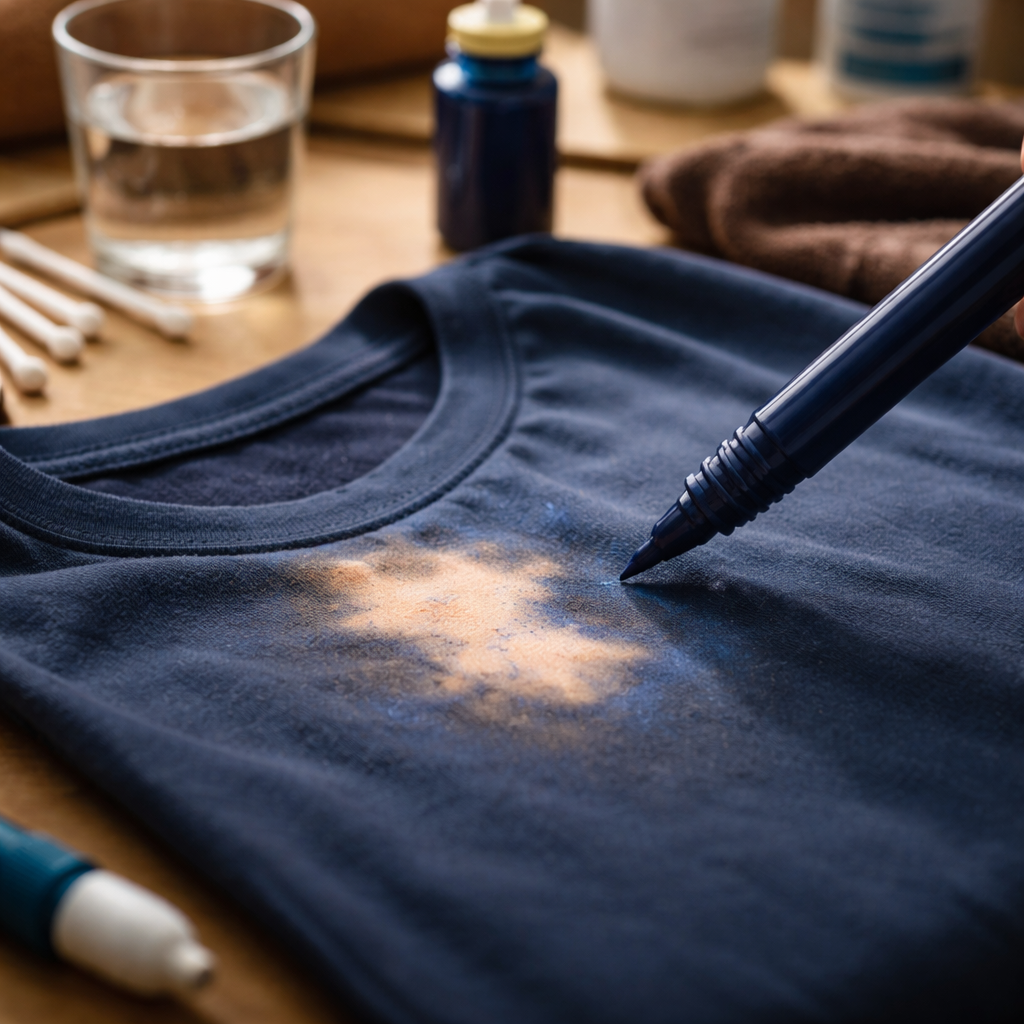
The fabric marker trick for small damage
Fabric markers — sometimes called textile markers — are an underrated tool for fixing small bleach spots on dark clothing. They’re available in a wide range of colors, dry quickly, and hold up through washing when the fabric is heat-set afterward with an iron.
The key is getting the right shade. It helps to bring the garment to the store or test on a hidden seam allowance before committing to the visible area. A slightly darker shade often blends more naturally than a perfect match, since fabric texture absorbs color differently across the surface.
When repair isn’t the answer — and that’s fine
Sometimes the bleached area is too large, too central, or on a fabric that doesn’t accept dye well enough for an invisible repair. In those cases, a creative approach often works better than chasing a perfect fix.
- Embroidery over the bleached spot adds texture and turns damage into a design element.
- Iron-on or sew-on patches — especially on denim or casual wear — have a long history of practical repurposing.
- Intentional bleach art: expanding the affected area into a deliberate tie-dye or ombre pattern using more bleach in a controlled way.
- Repurposing the garment into something else entirely — a tote bag, cleaning cloth, or cut-off shorts where the stain won’t be visible.
These aren’t last resorts — they’re legitimate options that often produce results people end up preferring over the original look.
A few things worth keeping in mind
Before diving into any repair, check the care label. Some fabrics explicitly warn against heat or certain chemicals, and ignoring those instructions can cause new damage on top of the existing bleach spot. Always test any dye, marker, or chemical neutralizer on a hidden part of the garment first.
Also worth noting: bleach-damaged fabric fibers are slightly weakened even after the visible discoloration is covered. Areas that have been heavily bleached may wear through faster over time, so it’s worth managing expectations — a repaired garment may look great but benefit from gentler washing going forward.
Getting bleach on something you care about is frustrating, but it rarely means the item is lost. With the right approach — quick rinsing, the correct dye or marker, and some patience — most pieces can be brought back to something close to their original state, or transformed into something genuinely new.