Most people who struggle with dry or flavorless results when they try to figure out how to roast a chicken are making the same handful of mistakes — and they’re easier to fix than you’d think. The difference between a bird that comes out pale and rubbery versus one with crackling golden skin and juicy meat often comes down to a few overlooked details: the temperature you start with, how you handle moisture, and what you do in the oven’s final minutes.
Why your oven temperature matters more than your recipe
One of the most common misconceptions is that a single steady temperature throughout the whole cook is the right approach. In practice, professional cooks often use a two-stage method: a higher initial heat to develop color and render the fat under the skin, followed by a moderate temperature to let the interior cook through without drying out the breast meat.
A starting temperature around 220–230°C (425–450°F) for the first 20 minutes creates the Maillard reaction — the chemical process responsible for that deep amber crust. After that, dropping to around 180°C (350°F) lets the thighs and drumsticks catch up with the breast without overcooking it.
The breast and the thigh are fundamentally different cuts of meat cooking inside the same bird. Treating them as identical is where most home cooks go wrong.
Preparation steps that genuinely change the outcome
Before the bird goes anywhere near heat, the prep work sets the foundation. These steps aren’t about being fussy — they have a direct impact on texture and flavor.
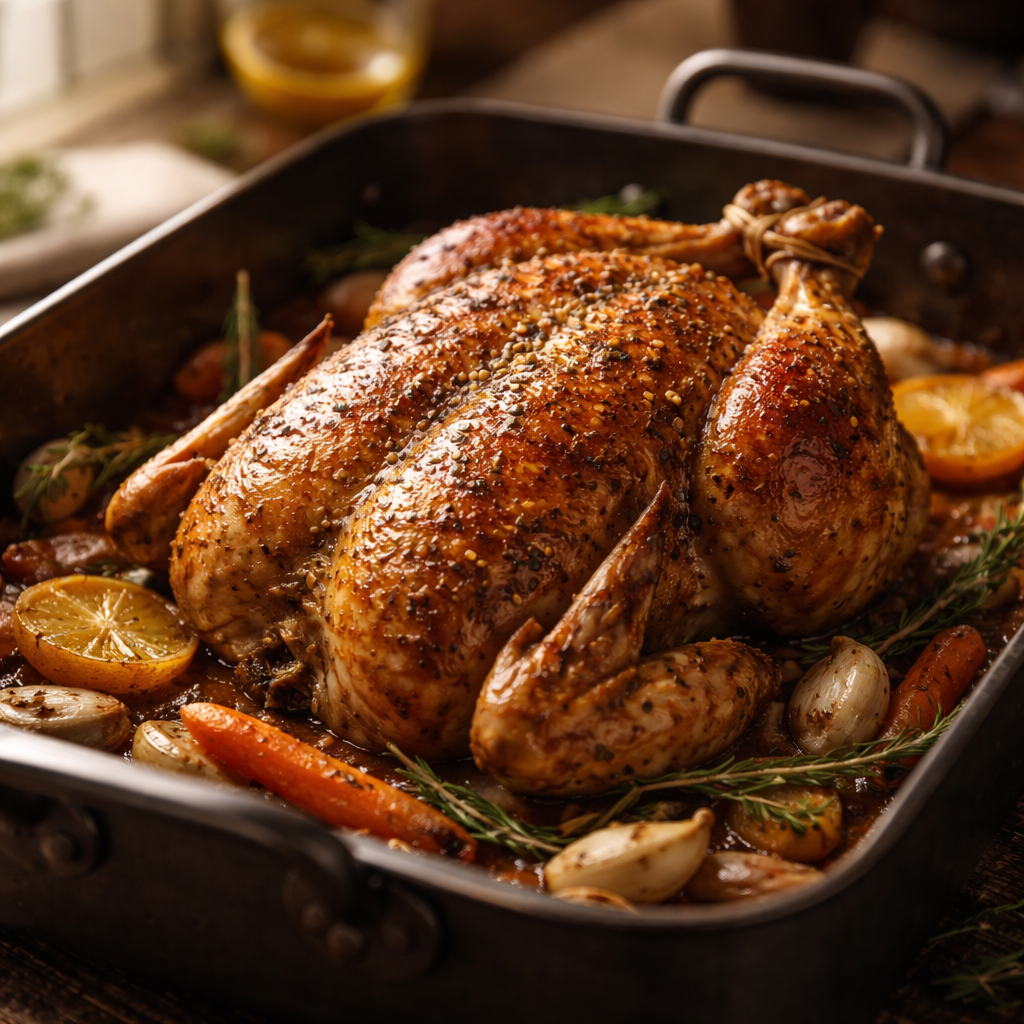
- Pat the chicken completely dry with paper towels. Moisture on the surface creates steam in the oven, which prevents browning.
- Let the chicken sit at room temperature for 30–45 minutes before roasting. A cold bird straight from the fridge extends cooking time unevenly.
- Season generously — not just the outside, but under the skin over the breast and thighs. Pushing softened butter or oil beneath the skin keeps the meat basted from the inside out.
- Truss the bird or at least tuck the wing tips. This isn’t strictly required, but it helps the chicken cook more evenly and prevents the thinner parts from drying out first.
- Elevate the chicken on a rack inside the roasting pan. Direct contact with the pan bottom traps steam underneath and softens the skin.
If you have the time, dry-brining the chicken uncovered in the refrigerator for several hours — or overnight — dramatically improves both the skin and the moisture retention of the meat. Salt draws out surface moisture initially, but it gets reabsorbed and seasons the meat deeper than surface seasoning alone ever could.
Aromatics, stuffing the cavity, and what actually works
Stuffing the cavity with aromatics like halved lemons, garlic cloves, fresh thyme, or rosemary adds fragrance rather than deep flavor — but that fragrance does matter. It fills your kitchen and subtly perfumes the meat near the cavity opening. What it won’t do is dramatically season the breast meat at the center of the bird, so don’t rely on it as a substitute for proper seasoning.
Adding roughly chopped onion, celery, and carrot underneath the chicken in the pan serves a dual purpose: it keeps the bird elevated slightly and creates the base for a simple pan sauce once the chicken is resting.
How to know when it’s actually done
Relying on color alone is unreliable. A pale chicken can be fully cooked; a golden one can still be raw near the bone. The only accurate tool is a meat thermometer.
| Part of the chicken | Safe internal temperature |
|---|---|
| Breast (thickest part) | 74°C / 165°F |
| Thigh (near the bone) | 80–85°C / 175–185°F |
| Drumstick | 80°C / 175°F |
Insert the thermometer into the thickest part of the thigh without touching bone — bone conducts heat and gives a falsely high reading. Once you hit those numbers consistently, you know the bird is both safe to eat and properly cooked through.
The resting step people always skip
Resting the chicken after it comes out of the oven isn’t optional if you care about juicy meat. During roasting, heat drives moisture toward the center of the bird. Cutting into it immediately means all of that liquid runs straight onto the cutting board.
A resting time of 10–15 minutes for a standard chicken (around 1.5–2 kg) allows the muscle fibers to relax and reabsorb the juices. Tent it loosely with foil — not tightly wrapped, which traps steam and softens the skin you worked to crisp up.
A simple timing guide for different bird sizes
| Chicken weight | Approximate roasting time at 200°C (390°F) |
|---|---|
| 1.2 – 1.5 kg | 55 – 65 minutes |
| 1.5 – 2 kg | 65 – 80 minutes |
| 2 – 2.5 kg | 80 – 95 minutes |
These are starting estimates, not guarantees. Oven calibration varies, chicken shape affects cooking time, and a stuffed cavity adds additional minutes. Always verify with a thermometer rather than trusting time alone.
From the first attempt to something you’ll make again
Roasting a whole chicken is one of those skills that compounds over time. The first time you do it, you’re focused on not undercooking it. The second time, you start noticing how different seasoning approaches change the flavor. By the third or fourth attempt, you’re adjusting heat stages, experimenting with spice rubs, and making pan sauce without thinking about it.
What makes it such a valuable recipe to have in your cooking rotation isn’t just the result on the plate — it’s that almost every technique involved transfers directly to other roasted meats, vegetable sides, and sauces. Get the chicken right, and a significant portion of your broader cooking improves along with it.